 Sims 2 – Re-Colouring Custom Content (Views:
5,364
)
If you’ve ever wondered how to re-colour custom content for the Sims 2, this one is for you. This is a simple tutorial to show you how to re-colour my little table…here we go:
What You Will Need:
- SimPE
- CEP – Required for re-colouring Maxis objects
- Legacy Nvidia DDS Utilities – Download and install them, just like any Windows program, then start SimPE, select the menu ‘Extra’, ‘Preferences’ and fill in the field ‘Nvidia DDS Tools’ with the exact installation path (you can use the “Browse” button to find the folder where the DDS Utilities are installed).
- Gimp – Free image editor
Click to view tutorial
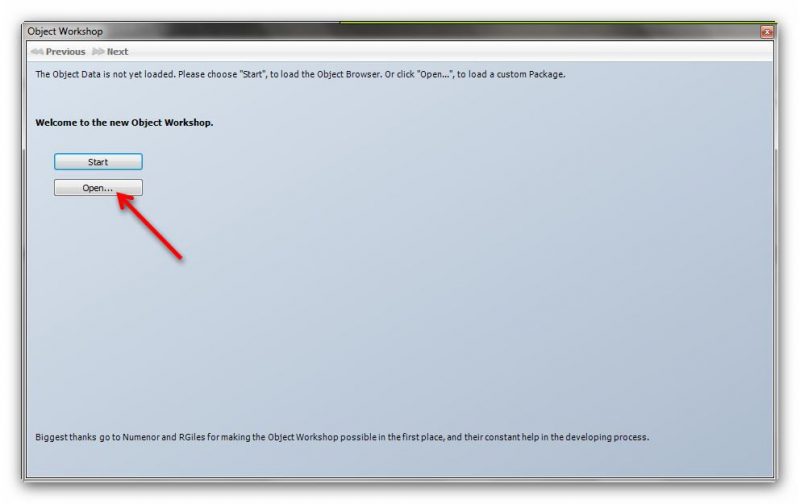
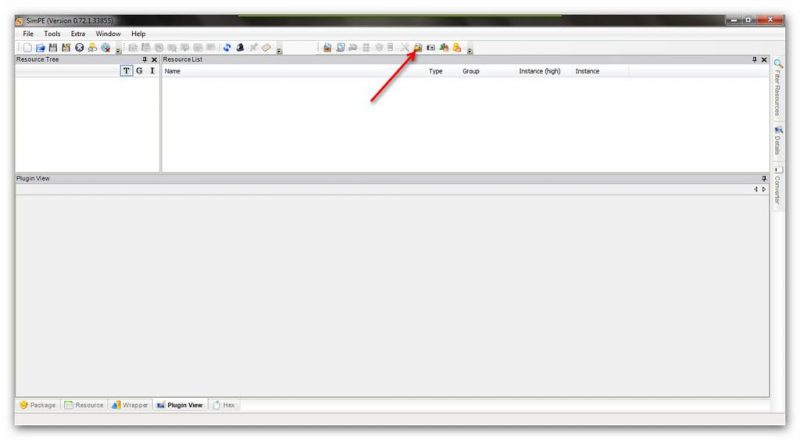
Open up SimPE and click to open the ‘Object Workshop’:
Because we are re-colouring a custom object rather than a Maxi’s object, click ‘Open’ instead of ‘Start’:
Surf to the file you want to open:

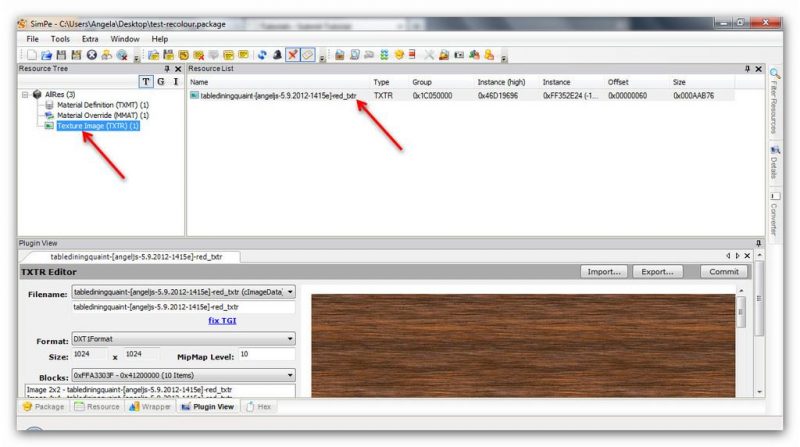
Select the texture image…it ends with ‘txtr’:
At this point, if you already have a texture you want to use, you can just use that, but I’m going to show you 2 ways to re-colour, as I have done in other tutorials.
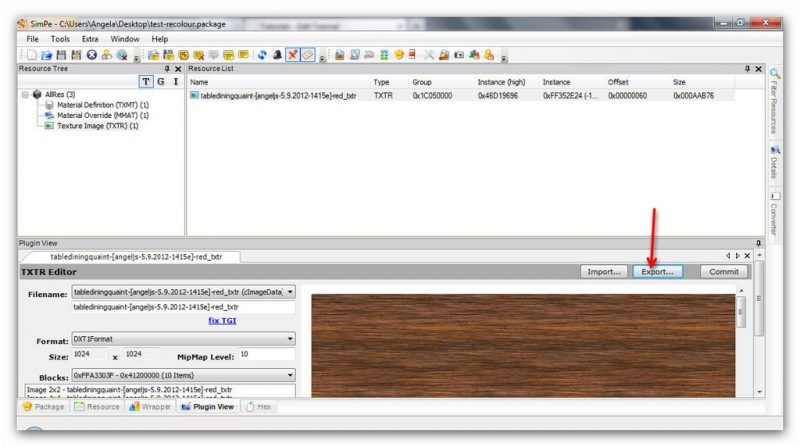
Export the texture image and save it where you can easily find it:
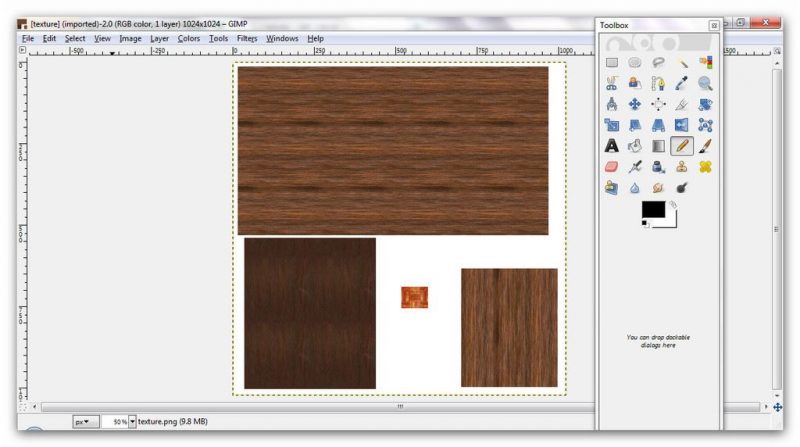
Start up Gimp and open the image you just saved. In this case, there are several parts of the texture you can choose to re-colour:
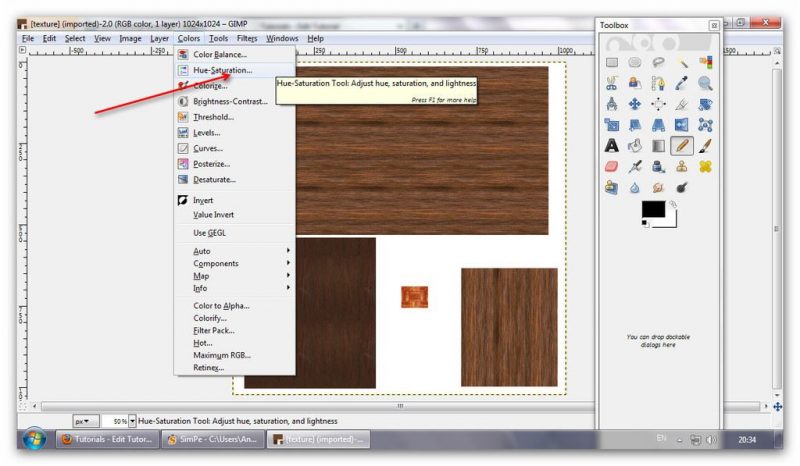
The absolute easiest way to re-colour any item is just to use the ‘Hue-Saturation’ tool in the ‘Colors’ menu:
Then adjust the sliders until you get the colour you want:
That’s what I did with my table for some of the colours. For the rest I used different textures. To do that, simply find an image you want to use and open it up in Gimp. I’m in a silly mood so I’m going to use a daft texture, but you can use any image you want:
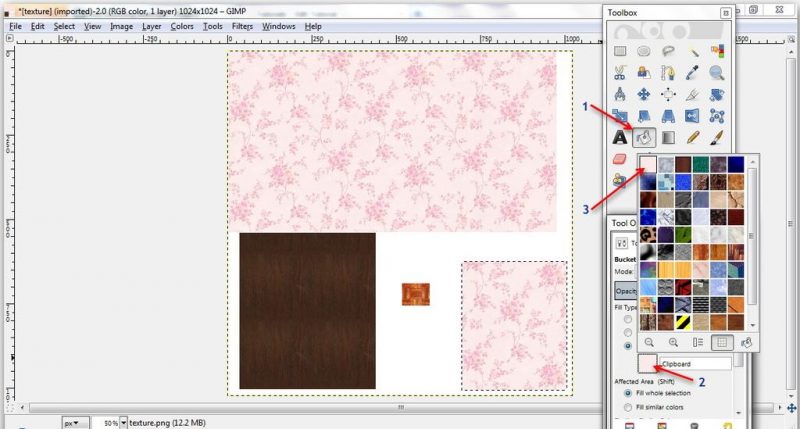
Now, you can simply paste the your texture over the entire image, but if an item has several re-colourable parts as this one does, you may as well make use of them. You can use a different image for each part, or the same for one or two and different ones for the rest, it’s entirely up to you. I’m going to use this image for most of this. To do it I use the selection tool to select the part of the texture I want to re-colour, then paste the image over it, or use the bucket fill tool by copying a seamless image to your clipboard then selecting the ‘clipboard’ option in the bucket fill tool:
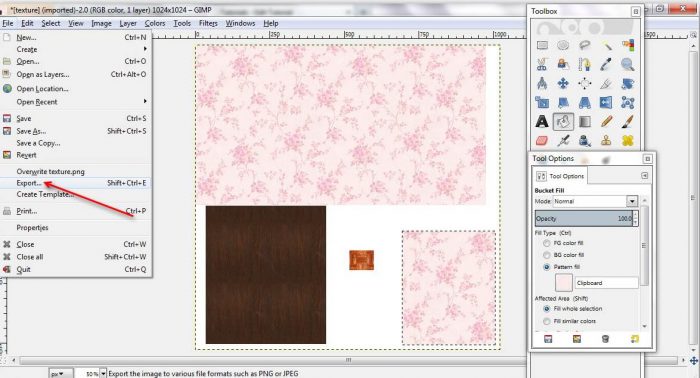
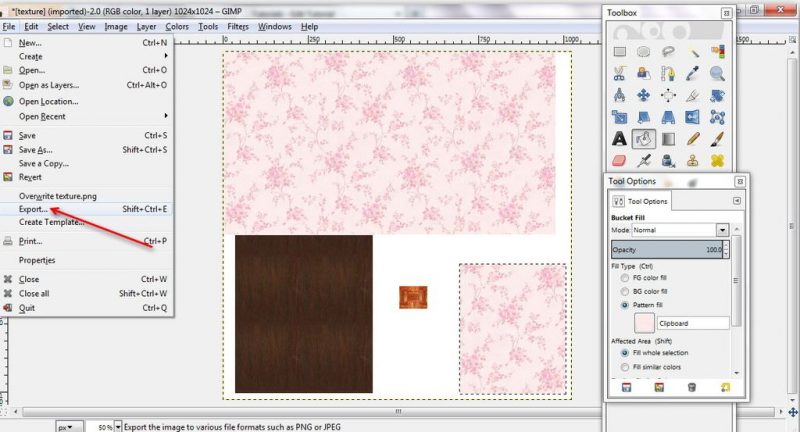
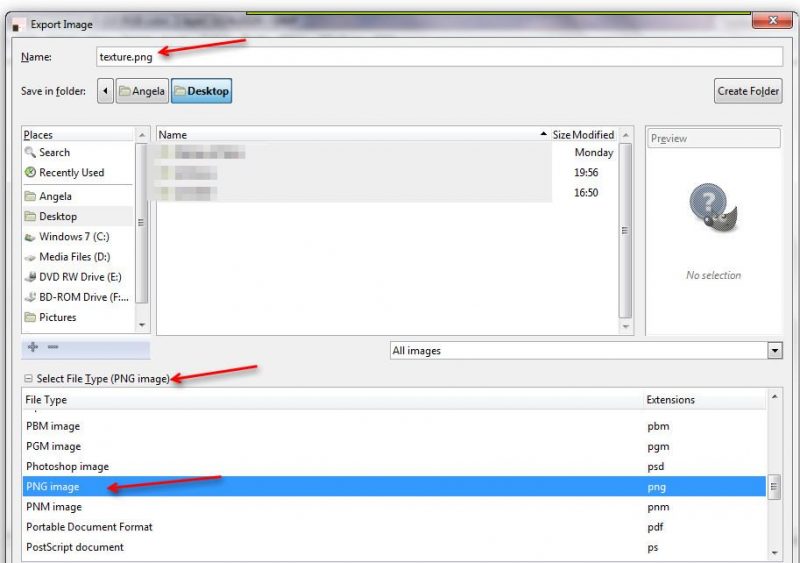
Export the new texture as a png file and save it where you can find it, or save over the original one:
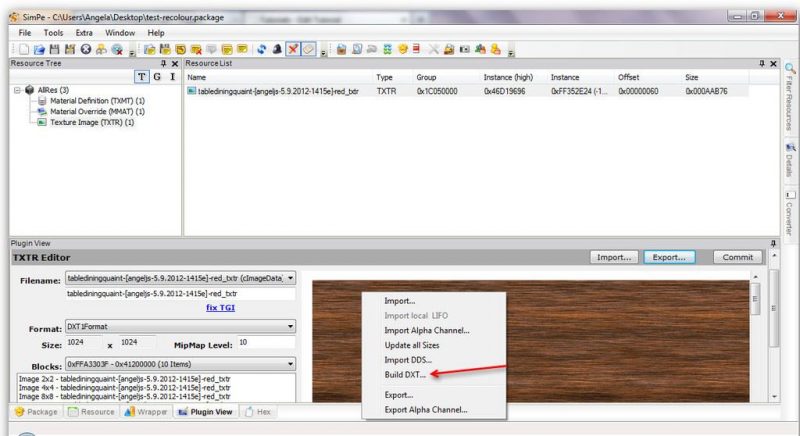
Go back to SimPE, right-click on the texture image (NOT the shadow image, if it has one!) and select ‘Build DXT’:
Open the image you just saved and click ‘Build’:
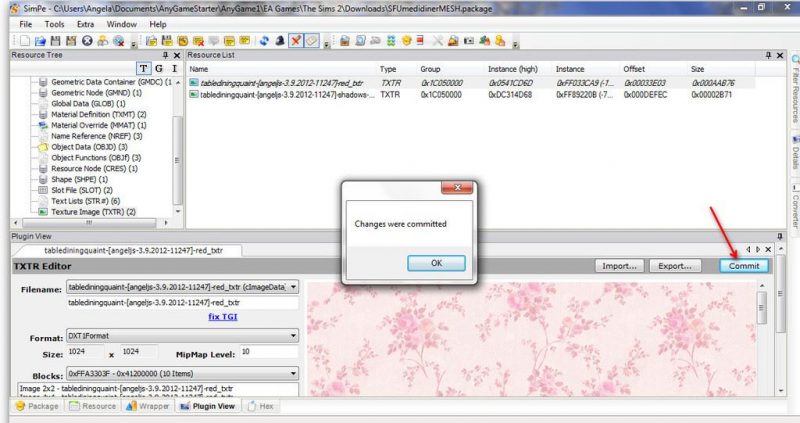
Commit the changes:
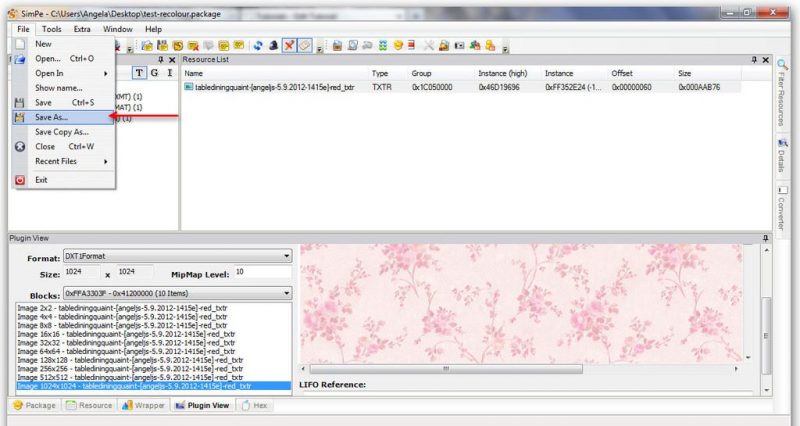
Once the image has finished processing, save it to your Sims 2 downloads folder, making sure you rename it:
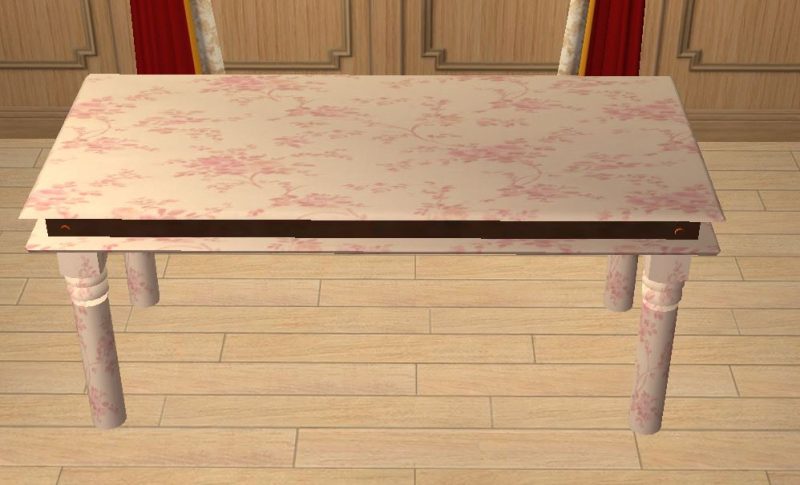
Now fire up your game to make sure it’s worked:
Experiment as much as you like, be as daring as you like, the re-colouring world is your oyster!
Please note that you can also use a seamless image with the Gimp pattern tool to fill an area.

You must be a logged in member to download this file




Great tutorial 😀
Thank you Princess! 😀